Category: Photography

Confident Lingerie Posing: Overcoming Shyness for Stunning Photography

How to Pose for Lingerie Photography Without Feeling Shy

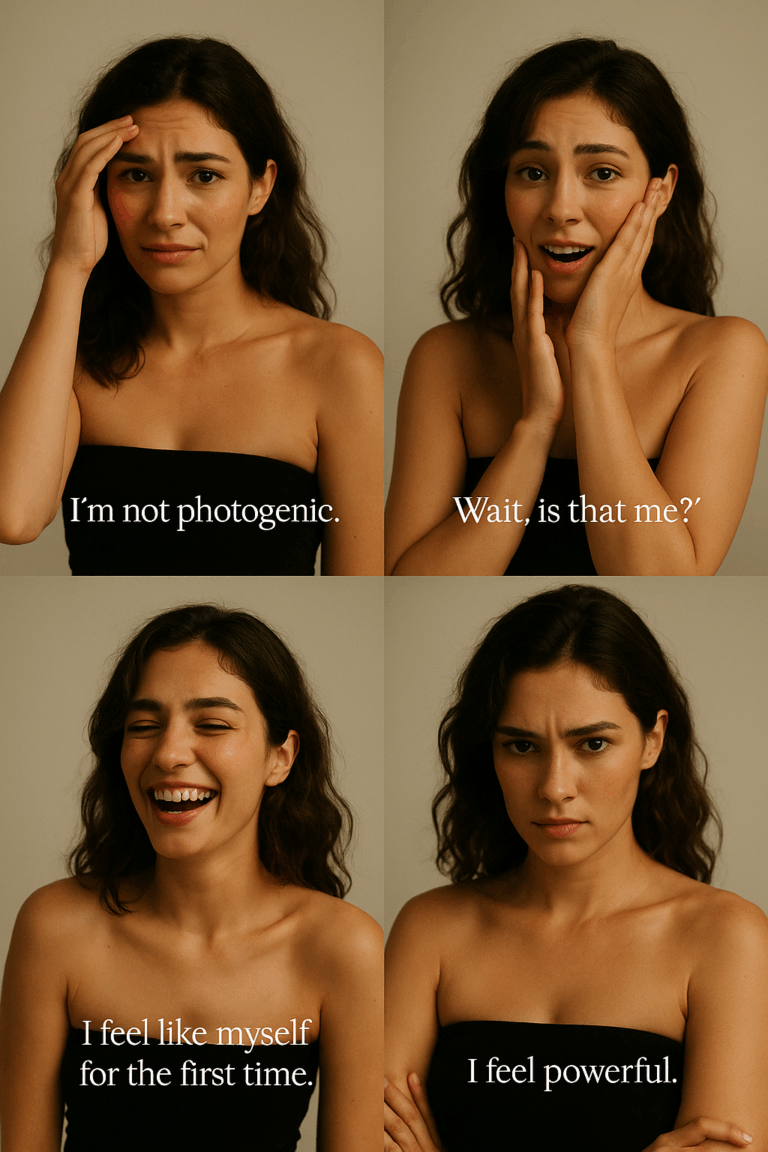
Lingerie photography is an empowering art form that celebrates beauty, confidence, and femininity. However, stepping in front of the camera in intimate clothing can feel daunting, especially for first-timers. Feeling shy or self-conscious is completely normal, but with the right mindset, preparation, and techniques, you can overcome these feelings and shine in your lingerie photoshoot.

In this blog, we’ll explore practical tips, tricks, and insights to help you pose confidently for lingerie photography while enjoying the process.

1. Set the Right Mindset

Embrace Your Unique Beauty
Remember, lingerie photography is about celebrating who you are. You don’t need to have a "model-perfect" body to look stunning. Confidence is the most attractive trait, and your uniqueness is what makes you shine.

* Affirmations: Start your day with positive affirmations. Say things like, “I am beautiful, confident, and in control.”

* Focus on Strengths: Identify the features you love about yourself and think about how to highlight them during the shoot.

* Think of the Purpose: Whether it’s for yourself, a partner, or a portfolio, remember why you’re doing this and let that drive your energy.
Trust the Photographer
Choose a photographer you feel comfortable with. Talk to them beforehand, share your concerns, and ask them about their approach. A professional photographer knows how to create a safe and judgment-free environment.

2. Prepare Yourself Like a Pro

Wardrobe Selection
Pick lingerie pieces that make you feel amazing. Comfort plays a huge role in confidence.

* Fitted Pieces: Ensure your lingerie fits well and accentuates your body. Avoid anything too tight or loose.

* Styles That Suit You: Experiment with different cuts, fabrics, and colors to find what makes you feel confident.

* Layering Options: Bring robes, stockings, or accessories like necklaces to add variety to your poses.
Skincare and Grooming
A bit of self-care can go a long way:

* Exfoliate and moisturize your skin for a healthy glow.

* Choose natural or glamorous makeup based on your style.

* Opt for a hairstyle that complements the mood of the shoot.
Practice Posing
Spend time in front of a mirror before the shoot to explore your angles and postures.

* Use your phone to take selfies or videos to test poses.

* Watch lingerie photoshoot videos for inspiration.

* Practice facial expressions, from soft smiles to sultry gazes.

3. Master Posing Techniques

Start with Simple Poses
Ease into the shoot with simple poses to get comfortable:

* Seated Pose: Sit with your legs crossed or slightly bent, leaning back on your hands for a relaxed, elegant look.

* Standing with a Curve: Place weight on one leg to create an "S" shape with your body, which is universally flattering.

* Hand on Hips: A classic pose that highlights your curves and creates a confident stance.
Use Your Hands Creatively
Your hands can add depth and emotion to your poses:

* Lightly touch your collarbone, face, or hair.

* Run your fingers along your neckline or waist for a sensual touch.

* Place your hands behind your back to elongate your posture.
Play with Eye Contact
* Look directly into the camera for a bold, confident vibe.

* Gaze away or close your eyes for a softer, dreamy look.
Experiment with Angles
* From Above: Looking up at the camera can highlight your eyes and jawline.

* From the Side: A side profile can accentuate your curves and create a mysterious vibe.

* From Below: For a dramatic and powerful look, shoot from a lower angle.
Incorporate Movement
Static poses can feel stiff. Add subtle movements to bring your shots to life:

* Shift your weight slightly from one foot to the other.

* Play with your hair or adjust a strap naturally.

* Turn your head slowly to catch different angles.

4. Overcome Shyness During the Shoot

Break the Ice
Start the session with casual conversation or a warm-up activity to ease into the mood. Share your favorite music playlist to create a relaxed and fun atmosphere.
Take Deep Breaths
Whenever you feel nervous, take a few deep breaths to calm yourself. This will help you feel more present and in control.
Focus on the Art
Think of the shoot as creating art. Channel your energy into expressing emotions through your poses and movements.

5. Pro Tips for Stunning Shots

Highlight Your Best Features
If you love your legs, show them off with seated or elongated poses. If you’re proud of your shoulders or back, choose poses that highlight these areas.
Use Props and Surroundings
Props can enhance your poses and make you feel less exposed:

* Drape a silk sheet around your shoulders.

* Use a chair to sit, lean, or hold onto for balance.

* Pose against a textured wall or bed for variety.
Lighting Matters
* Soft, natural light creates a flattering glow.

* Dramatic lighting can add depth and intrigue to your photos.
Experiment with Facial Expressions
Your face is as important as your body in lingerie photography. Experiment with:

* Subtle smiles.

* A confident smirk.

* Soft, serious expressions.

6. Post-Shoot Confidence Boost

Review the Photos Together
Ask your photographer to show you a few shots during the session. Seeing how stunning you look can boost your confidence for the rest of the shoot.
Celebrate Yourself
After the shoot, treat yourself. Whether it’s a nice meal, a relaxing bath, or simply admiring the photos, take a moment to celebrate your bravery and beauty.

Final Thoughts

Posing for lingerie photography is a journey of self-love and confidence. With the right preparation, mindset, and techniques, you can overcome shyness and enjoy the process. Remember, it’s not about perfection but about embracing and celebrating yourself.

Ready to step into the spotlight? You’ve got this!
Read More
The Power of Subtle Posing and Styling: Small Changes for Monumental Photography Results

The Power of Subtlety: How Minor Adjustments in Posing and Styling Lead to Monumental Results

In the world of photography, fashion, and personal branding, subtle changes often make the most significant impact. The difference between a good photo and a jaw-dropping masterpiece isn’t always about grand gestures or dramatic changes. Instead, it’s in the minute details—a tilt of the head, a shift in posture, or the interplay of colors and textures in styling. In this blog, we’ll explore how subtle adjustments in posing and styling can lead to monumental results, and we’ll share tips, tricks, and SEO-friendly insights to elevate your work.

Why Subtlety Matters

Subtlety creates depth and nuance. It draws viewers in, inviting them to linger and appreciate the finer details. Here’s why mastering subtle adjustments is essen

1. Enhances Natural Appeal: Minor tweaks often highlight the subject’s natural beauty without appearing forced or exaggerated.

2. Elicits Emotional Connections: Small, deliberate changes can evoke stronger emotions, making photos feel more relatable and authentic.

3. Builds Visual Harmony: Subtle adjustments ensure balance in the composition, lighting, and styling, creating a cohesive and captivating image.

The Art of Subtle Posing: Tips and Tricks

Posing is more than positioning the body; it’s about telling a story. Here are some subtle posing techniques that can transform your shots:
1. Master the Micro-Tilt
* What It Is: A slight tilt of the head or body adds dynamism.

* Why It Works: It prevents the pose from feeling static, introducing energy and fluidity.

* Pro Tip: Experiment with different angles for the head, like a 10-degree tilt, to find the most flattering perspective.
2. Relax the Hands
* What It Is: Keeping hands soft and natural rather than stiff.

* Why It Works: Hands convey emotion. Relaxed hands add grace, while tense hands can distract.

* Pro Tip: Ask the subject to imagine holding something delicate, like a bubble, to achieve a natural curve.
3. Subtle Weight Shifts
* What It Is: Shifting weight to one leg or slightly leaning forward.

* Why It Works: Adds a sense of ease and movement.

* Pro Tip: Encourage slight asymmetry—like one shoulder raised higher—to make the pose feel authentic.
4. Focus on Eye Direction
* What It Is: Adjusting the gaze just a few degrees.

* Why It Works: The eyes guide viewers. A small shift can create intrigue or direct attention.

* Pro Tip: Pair an off-camera gaze with a natural smile to convey thoughtfulness.

Styling Secrets: The Subtle Details That Transform

Great styling complements the subject without overshadowing them. Here are subtle styling techniques to make an impact:
1. Play with Textures
* Why It Works: Combining textures like silk, leather, or knit adds depth.

* Pro Tip: Stick to a cohesive color palette to maintain harmony while introducing contrast through texture.
2. Strategic Accessories
* Why It Works: Small accessories, like a delicate bracelet or minimalist earrings, can add interest without overwhelming.

* Pro Tip: Use accessories to draw attention to specific features, such as a long necklace to elongate the neckline.
3. Layering for Dimension
* Why It Works: Layers add complexity to the look, creating a visually engaging aesthetic.

* Pro Tip: Keep layers light and avoid bulkiness. A scarf or unbuttoned jacket works wonders.
4. Adjust for Symmetry
* Why It Works: Symmetry—or intentional asymmetry—is pleasing to the eye.

* Pro Tip: Use subtle styling adjustments, like tucking one side of a shirt, to create controlled asymmetry.

Lighting: The Subtlest Tool of All

Lighting is the unsung hero of subtlety. Even minor adjustments in light positioning can dramatically affect mood and tone.
* Feather Your Light: Point your light source slightly away from the subject to create soft, even illumination.

* Add Catchlights: Ensure the eyes have a small reflection of light to bring them to life.

* Control Shadows: Experiment with shadow placement to add depth without overpowering the subject.

Editing: Enhancing Without Overdoing

Editing should refine, not redefine. Here are tips to enhance subtlety in post-production:
* Skin Retouching: Avoid over-smoothing. Preserve the natural texture for authenticity.

* Color Grading: Use subtle shifts in tones to evoke mood. For instance, cooler tones convey calm, while warmer tones feel inviting.

* Dodge and Burn: Add dimension by enhancing highlights and shadows without exaggerating.

Conclusion: Subtle Changes, Monumental Impact

Mastering subtlety in posing, styling, lighting, and editing sets professionals apart. These small adjustments—when done thoughtfully—can elevate your work, leaving a lasting impression. Whether you're a photographer, stylist, or content creator, the power of subtlety is a game-changer. Experiment, refine, and let the magic unfold.

Ready to transform your craft? Share your experiences or book a session with us to see the power of subtlety in action!
Read More
Photographer’s Role: Empowering Models Through Respectful and Ethical Photography

Why Your Role as a Photographer Is to Empower, Not Objectify, the Model

In the world of photography, especially when working with models, the power dynamics between the photographer and the subject often go unexamined. As photographers, we hold a responsibility not only to capture striking images but also to foster an environment where models feel respected, valued, and empowered. Unfortunately, the line between appreciation and objectification can be blurred if intentionality and ethics are absent from the process.

Let’s explore why empowering models should be central to your photographic approach and how this perspective enriches both the art and the experience.

The Fine Line Between Empowerment and Objectification

Photography inherently involves interpretation. Through composition, lighting, and framing, you make artistic decisions that shape how the subject is perceived. However, when the focus shifts from celebrating the model’s individuality to treating them as mere objects of visual appeal, the imagery loses its soul. Objectification reduces a model to a static idea, often perpetuating stereotypes or ideals that may not align with their authentic self.

Empowerment, on the other hand, begins with recognizing the humanity and individuality of your subject. It’s about creating an equal collaboration where the model’s personality, story, and input become integral to the creative process. In doing so, your work gains depth and connection—a far cry from one-dimensional objectification.

Why Empowerment Matters in Photography

1. Building Trust and Comfort

Empowered models radiate confidence. When they trust the photographer to respect their boundaries, they feel more at ease, allowing for authentic expressions and dynamic poses. This results in imagery that resonates on a deeper level because it reflects genuine emotion and comfort.
2. Shaping Industry Standards
The photography industry has long been criticized for perpetuating harmful ideals, from unrealistic beauty standards to exploitative practices. As a photographer, you have the power to challenge these norms. By showcasing diverse, empowered representations of beauty, you can influence both public perception and industry practices for the better.
3. Creating Meaningful Art
Empowered subjects bring their own stories and energy into the frame. This collaboration enriches your work, transforming your images from mere technical achievements into meaningful art. The emotional depth of an empowered subject is something no amount of technical mastery can replicate.

Strategies for Empowering Models

1. Establish Clear Communication
From the first interaction, prioritize transparency. Discuss the concept, share your creative vision, and invite their input. This fosters a sense of collaboration and ensures the model feels heard and respected.
2. Respect Boundaries
Always seek consent before attempting poses, wardrobe adjustments, or concepts that may push personal limits. Empowerment is rooted in consent, and a respectful approach ensures that the model feels in control throughout the shoot.

3. Celebrate Diversity
Challenge conventional norms by working with models of different backgrounds, body types, and identities. Representation matters, and inclusive imagery is a powerful way to empower underrepresented voices.
4. Provide a Safe Environment
Create a professional and supportive atmosphere on set. Ensure that the team—from makeup artists to assistants—shares the same respect for the model. The environment you curate significantly impacts the model’s sense of safety and comfort.
5. Offer Constructive Feedback
During the shoot, guide the model with positive reinforcement. Celebrate what’s working and offer suggestions in a way that uplifts rather than critiques. Empowerment thrives in an atmosphere of encouragement.

Real-Life Examples of Empowerment in Action

Case Study 1: Challenging Beauty Standards
A photographer working with a plus-size model chose to highlight her strength and elegance rather than conform to traditional posing styles that often diminish larger bodies. By allowing the model to actively contribute ideas, the resulting images celebrated her individuality and redefined notions of beauty.
Case Study 2: Giving Voice to Stories

During a portrait session with a survivor of domestic abuse, the photographer focused on capturing her resilience rather than framing her solely as a victim. The model shared her story through the session, and the empowering narrative of strength became the focus of the imagery.

Conclusion: Empowerment Elevates Everyone

When photographers prioritize empowerment, they create a ripple effect that extends beyond the shoot. Empowered models walk away with increased confidence, audiences see representations that inspire, and photographers themselves gain the satisfaction of producing art that uplifts rather than diminishes.

Remember, photography is a collaborative art form. By embracing your role as an advocate for empowerment, you elevate your craft and contribute positively to an industry that desperately needs it. In every session, ask yourself: Am I honoring my subject’s humanity? When your answer is yes, the artistry will naturally follow.
Read More
Modeling in Motion: Mastering Dynamic Posing Techniques for Photographers

Ideas for Setting Up a Photography Studio: A Beginner’s Guide

Starting a photography studio can be an exciting venture, whether you are a budding photographer or looking to expand your hobby into a professional setup. A well-thought-out studio not only enhances your creativity but also boosts client satisfaction. Here’s a comprehensive guide packed with ideas and tips for setting up your photography studio, focusing on layout, equipment, lighting, and cost-effective solutions.

1. Define Your Niche

Before diving into the technical aspects, consider the type of photography you’ll focus on. Your niche influences the design and equipment needed for the studio. Common niches include:

* Portrait photography: Requires versatile backdrops and lighting.

* Product photography: Needs precise lighting and props for small or detailed items.

* Fashion photography: Benefits from larger spaces and advanced lighting setups.

* Food photography: Demands specific light control and styling accessories.

* Lifestyle photography: May require a combination of home-like furniture and natural light.

2. Choose the Right Location

The location of your studio plays a vital role in its success. Decide between:

* Home Studio: Ideal for beginners with a limited budget. Dedicate a spare room or a garage for your setup.

* Rented Space: Provides more room and flexibility, particularly if you need high ceilings or a specific ambiance.

* Mobile Studio: Useful for photographers who travel to clients’ homes or outdoor locations. Portable equipment is a must here.

Consider factors like accessibility, natural light availability, and parking when choosing your location.

3. Plan the Layout

Efficient use of space ensures a comfortable working environment and professional results. Divide your studio into functional zones:

* Shooting Area: The largest space for setting up cameras, lights, and backdrops. Ensure enough room for moving equipment.

* Equipment Storage: Use shelves, cabinets, or hooks for organizing cameras, lenses, cables, and lights.

* Editing Desk: A quiet corner with a computer or laptop for post-processing.

* Client Lounge: A seating area with comfortable chairs or a sofa, magazines, and a display of your portfolio.

* Wardrobe and Makeup Zone: For fashion shoots or portraits, include a dressing mirror, a clothes rack, and a makeup station.

4. Essential Equipment

A photography studio requires the right tools to achieve professional results. Here’s a checklist of essential items:

Cameras and Lenses:

Invest in a high-quality camera and versatile lenses. For instance:

* Full-frame DSLR or mirrorless camera: Offers high resolution and better low-light performance.

* Prime lenses: Ideal for portraits (e.g., 50mm or 85mm).

* Zoom lenses: Useful for flexibility in shooting angles.


Lighting:

Lighting is crucial in a studio. Key lighting equipment includes:

* Softboxes: Create soft, even lighting.

* Umbrellas: Offer broad light distribution.

* Ring lights: Perfect for portraits or beauty photography.

* Strobes/Flash Heads: Provide powerful and consistent light.

* Continuous lights: Useful for video and still photography.


Backdrops:

A variety of backdrops helps you cater to different themes:

* Paper rolls: Available in many colors for a seamless background.

* Fabric backdrops: Durable and reusable, ideal for textured effects.

* Vinyl backdrops: Easy to clean and versatile.


Modifiers:

Modifiers help shape and control light:

* Reflectors: Bounce light into shadows.

* Diffusers: Soften harsh light.

* Grids and barn doors: Control light direction and intensity.


Props:

Props add interest and depth to your photos. Include chairs, stools, cushions, and themed items related to your niche.


Accessories

Don’t forget these smaller, yet important, items:

* Tripod: Stabilizes your camera.

* Light stands: Keep your lights secure.

* Cables and triggers: For connecting and synchronizing equipment.

5. Create the Perfect Lighting Setup

Lighting can make or break a photo. Experiment with these setups:

* Three-Point Lighting: Combines a key light, fill light, and backlight for balanced images.

* Natural Light Augmentation: Use reflectors and diffusers to maximize natural light.

* High-Key and Low-Key Lighting: For dramatic effects in portrait or fashion photography.

Position lights to eliminate harsh shadows and achieve the desired mood.

6. Soundproofing and Ambiance

To create a professional environment:
* Install acoustic panels or carpets to minimize noise.

* Use neutral-colored walls to avoid unwanted color casts.

* Add plants, artwork, or shelves to personalize the space.

7. Invest in Post-Processing Tools

Editing is a crucial part of photography. Equip your studio with:

* High-performance computer/laptop.

* Editing software: Adobe Lightroom, Photoshop, or Capture One.

* Calibrated monitor: Ensures accurate color representation.

8. Budget-Friendly Tips

Starting a studio can be expensive, but these tips can help:

* Buy used equipment: Look for quality second-hand cameras and lighting gear.

* DIY backdrops: Create custom backdrops using painted walls or fabric.

* Start small: Begin with essential equipment and upgrade as your business grows.

* Leverage natural light: Choose a location with large windows to reduce artificial lighting costs.

9. Marketing Your Studio

To attract clients, build an online presence:

* Create a portfolio website: Showcase your best work and provide booking options.

* Social media marketing: Use platforms like Instagram and Pinterest to display your work.

* Collaborate: Partner with models, makeup artists, or businesses for mutual promotion.

* Offer promotions: Discounts for first-time clients or package deals.

10. Safety and Insurance

Prioritize safety to protect your investment and clients:

* Secure all heavy equipment with clamps or weights.

* Keep wires and cables organized to prevent tripping hazards.

* Get insurance for your equipment and liability coverage.

11. Expand Over Time

As your business grows:

* Add specialized equipment like gimbals or motorized sliders for video work.

* Upgrade your studio space or rent additional facilities.

* Explore workshops and certifications to refine your skills.

By carefully planning and investing in the right equipment, you can create a photography studio that enhances your creativity and meets the expectations of your clients. Start small, adapt to your niche, and continuously improve your setup to grow as a professional photographer.
Read More
Bold and Beautiful: The Art of Daring Photography

Bold and Beautiful: The Art of Daring Photography

Photography is not merely the act of pressing a shutter button; it is an art form that captures moments, evokes emotions, and tells compelling stories. In the realm of daring photography, the focus extends beyond the ordinary to embrace boldness, creativity, and an unapologetic exploration of the unconventional. Let’s delve into the principles, techniques, and inspirations that define this genre and learn how photographers can push boundaries to create captivating images.

Understanding Daring Photography

Daring photography is characterized by its willingness to challenge norms, defy conventions, and experiment with bold concepts. It often involves:

1. Unconventional Subjects: Shooting subjects that may not conform to traditional standards of beauty or themes.

2. Creative Lighting: Using light in unexpected ways, such as extreme contrasts, silhouettes, or unusual sources like neon or fire.

3. Unique Perspectives: Exploring unusual angles, extreme close-ups, or dramatic wide shots to present a fresh viewpoint.

4. High-Risk Locations: Capturing images in challenging environments—be it extreme weather, urban rooftops, or underwater scenes.

5. Storytelling: Creating visuals that provoke thought, tell a story, or spark dialogue about societal or personal issues.

Techniques for Bold Photography

Achieving striking results requires a mastery of techniques and the courage to take calculated risks:

1. Play with Composition

* Rule-breaking: While the rule of thirds is a classic, daring photographers often break it, placing subjects in unconventional positions or even off-center.

* Layering: Incorporating multiple layers within a frame adds depth and complexity to the image.

2. Leverage Color and Contrast

* High Contrast: Amplify the dynamic range between light and dark to create dramatic tension.

* Color Psychology: Use bold, contrasting colors to evoke specific emotions or highlight subjects.

3. Experiment with Motion

* Long Exposures: Capture trails of light, flowing water, or moving crowds for surreal effects.

* Panning: Follow a moving subject to create a sense of speed and blur the background.

4. Focus on Textures and Details

* Use macro lenses to emphasize intricate details such as skin textures, fabric weaves, or natural patterns.

* Combine sharp focus with soft elements for a balanced yet intriguing frame.

5. Embrace Imperfections

* Allow intentional blur, grain, or distortion to add an artistic edge to your images.

* Shoot through objects like glass or fabric for unique effects.

Gear for Bold Photography

While creativity is key, having the right tools can make a significant difference:

1. Camera Bodies: Full-frame cameras like the Canon R6 or Sony A7 series offer excellent low-light performance and dynamic range.

2. Lenses:

* Prime Lenses: A 50mm f/1.8 for sharp portraits or a 100mm macro for detail shots.

* Wide-angle Lenses: Ideal for dramatic perspectives and expansive compositions.

3. Lighting Equipment:

* Speedlites, continuous LED lights, or strobes with gels for experimental lighting setups.

* Reflectors and diffusers to shape and soften light.

4. Accessories: Tripods, remote shutters, and ND filters are invaluable for long exposures and creative effects.

Drawing Inspiration for Daring Photography


1. Fine Art Photography: Explore works by legends like Annie Leibovitz or Salvador Dalí for their surreal and bold approaches.

2. Cinematic Techniques: Study the use of lighting and framing in films to translate cinematic drama into still images.

3. Cultural Exploration: Seek inspiration from global traditions, urban art, or natural phenomena to add uniqueness to your work.

4. Music and Literature: Songs, poems, and novels often evoke strong visual ideas that can be translated into daring concepts.

Overcoming Challenges

Pushing boundaries is not without obstacles. Here’s how to tackle them:

1. Fear of Judgment:

* Remember that art is subjective; what may seem unconventional to one might be groundbreaking to another.

* Seek feedback from trusted peers to refine your work.

2. Technical Limitations:

* Familiarize yourself with your gear to maximize its potential.

* Invest in post-processing tools like Adobe Lightroom or Photoshop to enhance your vision.

3. Safety Concerns:

* Plan extensively when shooting in high-risk environments.

* Use safety gear and never compromise your well-being for a shot.

Post-Processing: Adding the Final Touch

Editing plays a crucial role in elevating bold photographs:
1. Color Grading: Adjust hues, saturation, and tones to achieve a mood that complements your vision.

2. Selective Enhancements: Highlight specific areas of the image using brushes or gradients to draw focus.

3. Creative Effects: Experiment with double exposures, overlays, or composite techniques for surreal results.

The Philosophy Behind Daring Photography

At its core, bold photography is about storytelling and self-expression. It’s not just about taking risks but about conveying emotions and perspectives that resonate deeply with viewers. By daring to explore uncharted territory, photographers can break barriers, inspire others, and leave a lasting impact on the art world.

Conclusion

Whether you're an aspiring photographer or a seasoned professional, embracing boldness can transform your work. The key lies in balancing creativity with technique, preparation with spontaneity, and confidence with humility. Dare to dream, dare to create, and dare to capture the extraordinary.
Read More
Ideas for Setting Up a Photography Studio: A Beginner’s Guide

Ideas for Setting Up a Photography Studio: A Beginner’s Guide

Starting a photography studio can be an exciting venture, whether you are a budding photographer or looking to expand your hobby into a professional setup. A well-thought-out studio not only enhances your creativity but also boosts client satisfaction. Here’s a comprehensive guide packed with ideas and tips for setting up your photography studio, focusing on layout, equipment, lighting, and cost-effective solutions.

1. Define Your Niche

Before diving into the technical aspects, consider the type of photography you’ll focus on. Your niche influences the design and equipment needed for the studio. Common niches include:

* Portrait photography: Requires versatile backdrops and lighting.

* Product photography: Needs precise lighting and props for small or detailed items.

* Fashion photography: Benefits from larger spaces and advanced lighting setups.

* Food photography: Demands specific light control and styling accessories.

* Lifestyle photography: May require a combination of home-like furniture and natural light.

2. Choose the Right Location

The location of your studio plays a vital role in its success. Decide between:

* Home Studio: Ideal for beginners with a limited budget. Dedicate a spare room or a garage for your setup.

* Rented Space: Provides more room and flexibility, particularly if you need high ceilings or a specific ambiance.

* Mobile Studio: Useful for photographers who travel to clients’ homes or outdoor locations. Portable equipment is a must here.

Consider factors like accessibility, natural light availability, and parking when choosing your location.

3. Plan the Layout

Efficient use of space ensures a comfortable working environment and professional results. Divide your studio into functional zones:

* Shooting Area: The largest space for setting up cameras, lights, and backdrops. Ensure enough room for moving equipment.

* Equipment Storage: Use shelves, cabinets, or hooks for organizing cameras, lenses, cables, and lights.

* Editing Desk: A quiet corner with a computer or laptop for post-processing.

* Client Lounge: A seating area with comfortable chairs or a sofa, magazines, and a display of your portfolio.

* Wardrobe and Makeup Zone: For fashion shoots or portraits, include a dressing mirror, a clothes rack, and a makeup station.

4. Essential Equipment

A photography studio requires the right tools to achieve professional results. Here’s a checklist of essential items:

Cameras and Lenses:

Invest in a high-quality camera and versatile lenses. For instance:

* Full-frame DSLR or mirrorless camera: Offers high resolution and better low-light performance.

* Prime lenses: Ideal for portraits (e.g., 50mm or 85mm).

* Zoom lenses: Useful for flexibility in shooting angles.


Lighting:

Lighting is crucial in a studio. Key lighting equipment includes:

* Softboxes: Create soft, even lighting.

* Umbrellas: Offer broad light distribution.

* Ring lights: Perfect for portraits or beauty photography.

* Strobes/Flash Heads: Provide powerful and consistent light.

* Continuous lights: Useful for video and still photography.


Backdrops:

A variety of backdrops helps you cater to different themes:

* Paper rolls: Available in many colors for a seamless background.

* Fabric backdrops: Durable and reusable, ideal for textured effects.

* Vinyl backdrops: Easy to clean and versatile.


Modifiers:

Modifiers help shape and control light:

* Reflectors: Bounce light into shadows.

* Diffusers: Soften harsh light.

* Grids and barn doors: Control light direction and intensity.


Props:

Props add interest and depth to your photos. Include chairs, stools, cushions, and themed items related to your niche.


Accessories

Don’t forget these smaller, yet important, items:

* Tripod: Stabilizes your camera.

* Light stands: Keep your lights secure.

* Cables and triggers: For connecting and synchronizing equipment.

5. Create the Perfect Lighting Setup

Lighting can make or break a photo. Experiment with these setups:

* Three-Point Lighting: Combines a key light, fill light, and backlight for balanced images.

* Natural Light Augmentation: Use reflectors and diffusers to maximize natural light.

* High-Key and Low-Key Lighting: For dramatic effects in portrait or fashion photography.

Position lights to eliminate harsh shadows and achieve the desired mood.

6. Soundproofing and Ambiance

To create a professional environment:
* Install acoustic panels or carpets to minimize noise.

* Use neutral-colored walls to avoid unwanted color casts.

* Add plants, artwork, or shelves to personalize the space.

7. Invest in Post-Processing Tools

Editing is a crucial part of photography. Equip your studio with:

* High-performance computer/laptop.

* Editing software: Adobe Lightroom, Photoshop, or Capture One.

* Calibrated monitor: Ensures accurate color representation.

8. Budget-Friendly Tips

Starting a studio can be expensive, but these tips can help:

* Buy used equipment: Look for quality second-hand cameras and lighting gear.

* DIY backdrops: Create custom backdrops using painted walls or fabric.

* Start small: Begin with essential equipment and upgrade as your business grows.

* Leverage natural light: Choose a location with large windows to reduce artificial lighting costs.

9. Marketing Your Studio

To attract clients, build an online presence:

* Create a portfolio website: Showcase your best work and provide booking options.

* Social media marketing: Use platforms like Instagram and Pinterest to display your work.

* Collaborate: Partner with models, makeup artists, or businesses for mutual promotion.

* Offer promotions: Discounts for first-time clients or package deals.

10. Safety and Insurance

Prioritize safety to protect your investment and clients:

* Secure all heavy equipment with clamps or weights.

* Keep wires and cables organized to prevent tripping hazards.

* Get insurance for your equipment and liability coverage.

11. Expand Over Time

As your business grows:

* Add specialized equipment like gimbals or motorized sliders for video work.

* Upgrade your studio space or rent additional facilities.

* Explore workshops and certifications to refine your skills.

By carefully planning and investing in the right equipment, you can create a photography studio that enhances your creativity and meets the expectations of your clients. Start small, adapt to your niche, and continuously improve your setup to grow as a professional photographer.
Read More
Reflections of Elegance: Glamour Photography with Ground Mirrors

Reflections of Elegance: Glamour Photography with Ground Mirrors

Glamour photography thrives on innovation and creativity, and using mirrors on the ground can elevate your shoots to an entirely new level. This technique not only adds depth and dimension to your images but also creates intriguing reflections that captivate viewers. Here’s an in-depth guide to mastering glamour photography with mirrors on the ground, focusing on precise details and advanced techniques.

1. Selecting the Perfect Mirror

Choosing the right mirror is crucial for the success of this technique. Here are the specifics to consider:
Size and Scale:

* Full-length mirrors are ideal for capturing the entire body and creating expansive reflections.

* Medium-sized mirrors can focus on the torso and head, offering more controlled reflections.

* Small mirrors are great for detailed shots of the face or specific body parts.
Shape and Style:

* Rectangular or square mirrors provide a classic and balanced look.

* Round or oval mirrors add a touch of softness and elegance.

* Custom-shaped mirrors can introduce a unique artistic element to your photos.
Quality:

* Ensure the mirror is free of scratches, smudges, and distortions.

* High-quality, polished mirrors reflect light evenly and produce clear images.

2. Optimal Placement and Scene Setup

The placement of the mirror and the overall scene setup are paramount. Here’s a detailed breakdown:
Mirror Placement:

* Position the mirror directly on the ground. For stability, ensure it lies flat without any wobble.

*Experiment with angles; tilting the mirror slightly can create varied and interesting reflections.
Background and Environment:

* Clean and Minimalistic: Ensure the background is clutter-free to avoid distractions in the reflection.

* Complementary Colors: Use backdrops and props that enhance the subject’s attire and the overall theme.
Lighting Considerations:

* Natural Light: Use large windows or shoot outdoors to utilize soft, diffused natural light. This minimizes harsh shadows and creates a flattering reflection.

* Artificial Lighting: Employ softboxes, reflectors, and diffusers. Position lights to highlight the subject without casting unwanted shadows on the mirror.

3. Advanced Posing Techniques

Posing the subject is where the magic happens. Here’s how to get the most out of your setup:
Direct Interaction:

Have the subject engage directly with the mirror. This can include looking into the mirror, touching it, or even posing as if they are interacting with their own reflection.
Dynamic Poses:

* Encourage the subject to try various poses. Sitting, lying down, or leaning can create different reflections and add depth to the composition.

* Experiment with movement. Capturing the subject while they adjust their position or move slightly can result in candid and natural reflections.
Expression and Emotion:

Guide the subject to express different emotions. A sultry gaze, a playful smile, or an introspective look can change the entire mood of the photograph.

4. Camera Settings and Techniques

The technical side is just as important. Here’s how to nail it:

Camera Angle:

Shoot from a low angle to emphasize the reflection. This technique can make the subject appear more prominent and imposing.
Focus and Depth of Field:

* Use a smaller aperture (higher f-stop) to keep both the subject and their reflection in sharp focus.

* Alternatively, play with a shallow depth of field to focus on the subject and blur the reflection slightly for a dreamy effect.
Exposure and White Balance:

* Adjust your exposure settings to ensure the reflection is not overexposed or underexposed.

* Use custom white balance settings to maintain color accuracy, especially when using mixed lighting.

5. Post-Processing Mastery

Editing is where you can refine and perfect your shots. Here’s an advanced approach:
Reflection Enhancement:

* Use adjustment layers in software like Photoshop to enhance the brightness and contrast of the reflection.

* Utilize the Clone Stamp or Healing Brush tool to remove any imperfections in the reflection.
Color Grading:

Apply subtle color grading to harmonize the overall look of the photo. Use tools like the Color Balance, Hue/Saturation, and Curves adjustments.
Retouching:

Carefully retouch both the subject and their reflection to remove blemishes and enhance features. Pay attention to maintaining consistency in skin tone and texture.

Conclusion

Glamour photography using mirrors on the ground is a sophisticated technique that requires attention to detail, creativity, and technical skill. By selecting the right mirror, setting up the scene meticulously, guiding the subject with advanced posing techniques, employing precise camera settings, and mastering post-processing, you can create stunning, reflective glamour shots that captivate and intrigue. At SAM Studio, we encourage you to push the boundaries of your creativity and explore the endless possibilities this technique offers. Happy shooting!

Stay tuned to SAM Studio’s blog for more in-depth photography guides and tips. Dive deep into the world of fashion and glamour photography with us!
Read More
Lights, Shadows, Clicks: Exploring Photography Techniques

Lights, Shadows, Clicks: Exploring Photography Techniques

Photography is an art that captures moments, emotions, and stories through a lens. At SAM Studio, we believe that mastering the art of photography requires an understanding of various techniques and elements that can transform a simple click into a masterpiece. In this comprehensive guide, we will delve into the fascinating world of lights, shadows, and clicks, exploring a wide range of photography techniques to help you enhance your skills and creativity.

Understanding Lighting

Lighting is one of the most crucial elements in photography. It sets the mood, highlights the subject, and can dramatically change the perception of an image.
1. Natural Light:

Golden Hour: The hour after sunrise and before sunset, known for its soft, warm tones.
Blue Hour: The period of twilight just before sunrise and after sunset, offering a cool and serene ambiance.
Diffused Light: Overcast days or shaded areas provide soft, even lighting that reduces harsh shadows.
2. Artificial Light:

Studio Lighting: Using equipment like softboxes, reflectors, and strobes to control light intensity and direction.
Continuous Lighting: Constant light sources like LED panels, useful for both photography and videography.
Flash: On-camera or off-camera flash to illuminate subjects, often used with modifiers like diffusers and gels.
3. Lighting Techniques:

Three-Point Lighting: A classic setup with key light, fill light, and backlight to create depth and dimension.
Rembrandt Lighting: A technique creating a triangle of light under the eye opposite the light source, adding drama.
Split Lighting: Illuminating one side of the subject’s face while the other remains in shadow, perfect for creating contrast.

Mastering Shadows

Shadows add depth, texture, and mood to photographs. Understanding how to manipulate shadows can elevate your images to the next level.
1. Hard Shadows:

Created by a small, intense light source, resulting in sharp, defined edges.
Ideal for adding drama and a sense of mystery.
2. Soft Shadows:

Produced by larger, diffused light sources, creating gentle transitions between light and dark areas.
Perfect for portrait photography and achieving a natural look.
3. Shadow Play:

Silhouettes: Capturing subjects against a bright background, rendering them as dark shapes.
Chiaroscuro: A technique using strong contrasts between light and dark to create a sense of volume and three-dimensionality.
Reflections: Using mirrors, water, or glass to create interesting and dynamic shadow effects.

Capturing the Perfect Click

The moment you press the shutter button is critical. Here are techniques to ensure you capture that perfect click.
1. Composition:

Rule of Thirds: Dividing the frame into nine equal parts and placing key elements along these lines or their intersections.
Leading Lines: Using natural lines in the scene to guide the viewer’s eye toward the main subject.
Symmetry and Patterns: Finding balance and repetition in scenes to create visually appealing compositions.
2. Focus and Depth of Field:

Aperture Settings: Controlling the depth of field by adjusting the aperture. A wide aperture (low f-number) creates a shallow depth of field, while a narrow aperture (high f-number) keeps more of the scene in focus.
Selective Focus: Focusing on a specific part of the scene to draw attention to the subject and create a blurred background.
3. Shutter Speed:

Freelancers must navigate the legal Fast Shutter Speed: Freezing motion, ideal for action and sports photography.
Slow Shutter Speed: Capturing motion blur, perfect for creative effects like light trails and flowing water.
4. ISO Settings:

Adjusting ISO to control the camera’s sensitivity to light. Lower ISO for bright conditions and higher ISO for low-light situations, balancing between exposure and noise.

Advanced Techniques

For those looking to push the boundaries of their photography, here are some advanced techniques to explore.
1. HDR (High Dynamic Range) Photography:

Combining multiple exposures to capture a wider range of light and dark details, resulting in more balanced and detailed images.
2. Panoramic Photography:

Stitching together multiple images to create wide-angle or 360-degree views, ideal for landscapes and architectural shots.
3. Macro Photography:

Capturing extreme close-ups of small subjects, revealing intricate details and textures.
4. Long Exposure Photography:

Using extended shutter speeds to capture scenes over a period of time, creating surreal and ethereal effects, especially with moving elements like clouds, water, and lights.
5. Bokeh:

Creating aesthetically pleasing out-of-focus backgrounds by using wide apertures, enhancing the subject’s isolation and adding a dreamy quality to images.

Post-Processing Techniques

The art of photography doesn’t end with the click. Post-processing is a vital step in refining and enhancing your images.
1.Basic Adjustments:

Exposure and Contrast: Balancing the light and dark areas to create a well-exposed image.
Color Correction: Adjusting white balance and color tones to achieve natural or artistic effects.
2. Retouching:

Skin Smoothing: Enhancing portraits by removing blemishes and imperfections.
Dodge and Burn: Selectively lightening or darkening areas to add depth and focus.
3. Creative Edits:

Exposure and Contrast: Balancing the light and dark areas to create a well-exposed image.
Color Correction: Adjusting white balance and color tones to achieve natural or artistic effects.
4. Sharpening and Noise Reduction:

Enhancing details and reducing graininess for crisp, clean images.

Conclusion

Photography is a journey of continuous learning and exploration. By understanding and experimenting with various lighting conditions, shadow manipulations, and clicking techniques, you can unlock new creative possibilities and refine your craft. At SAM Studio, we encourage you to embrace these techniques, push the boundaries of your creativity, and transform your vision into stunning visual art. Happy clicking!
Read More
Photography Trends 2024: What’s In and What’s Out

Photography Trends 2024: What’s In and What’s Out

Welcome to SAM Studio's comprehensive guide to the hottest photography trends of 2024! Photography, like any art form, continually evolves, influenced by technological advancements, cultural shifts, and creative experimentation. As we dive into the year, it's essential to stay ahead of the curve and understand what's shaping the world of photography. Here’s a detailed look at what's in and what's out for 2024.

What’s In

1. AI-Enhanced Editing

Artificial Intelligence (AI) is revolutionizing photo editing. AI-powered software can now perform complex tasks like enhancing details, removing backgrounds, and even colorizing black-and-white photos with incredible precision and speed. Tools like Adobe's Sensei and Luminar AI are becoming indispensable, allowing photographers to focus more on creativity and less on technicalities.

2. Sustainable Photography

Eco-consciousness is a significant trend across all industries, and photography is no exception. Photographers are increasingly aware of their environmental footprint, opting for sustainable practices. This includes using eco-friendly printing materials, reducing plastic usage, and choosing energy-efficient equipment. Additionally, capturing and promoting eco-friendly subjects and themes is gaining popularity.

3. Mobile Photography

With smartphone cameras becoming more advanced, mobile photography continues to rise. The convenience and accessibility of smartphones, coupled with powerful built-in cameras, make them a favorite tool for both amateur and professional photographers. The latest models offer features like multiple lenses, AI enhancements, and high-resolution sensors, allowing for stunning images on the go.

4. 360-Degree Photography and Virtual Tours

Immersive photography experiences are trending, especially in real estate, travel, and event photography. 360-degree photos and virtual tours offer viewers an interactive way to explore spaces. This trend is fueled by the growing demand for virtual reality (VR) content, providing a unique way to experience destinations, properties, and events.

5. Retro and Film Photography

Nostalgia for the past is bringing film photography and retro styles back into the limelight. Many photographers are embracing the unique aesthetic of film, including its grain, color imperfections, and manual process. Simultaneously, digital filters that mimic vintage looks are in vogue, allowing photographers to achieve that classic feel without needing traditional film.

6. Inclusive and Diverse Narratives

There's a growing emphasis on inclusivity and diversity in photography. Photographers are making conscious efforts to capture a broader range of subjects, representing different cultures, genders, ages, and body types. This trend is about celebrating diversity and ensuring all stories are told, creating a richer and more inclusive visual narrative.

7. Drone Photography

Drone photography continues to soar, offering unique aerial perspectives that were once impossible without expensive equipment. Drones are now more affordable, compact, and user-friendly, making them accessible to a broader range of photographers. The stunning aerial views captured by drones are particularly popular in landscape, real estate, and event photography.

What’s Out

1. Overly Staged and Posed Photography

The trend is moving away from overly staged and posed photography towards more candid and authentic shots. Viewers and clients are seeking genuine moments and real emotions, preferring images that tell a story rather than those that look too perfect and artificial.

2. Heavy Filters and Over-Editing

The era of heavy filters and over-edited photos is fading. Today's audiences appreciate subtle edits that enhance natural beauty rather than drastically altering the original image. Over-editing can lead to unnatural and unrealistic photos, which are becoming less appealing in a world that values authenticity.

3. Monochrome Minimalism

While minimalism remains popular, the trend towards monochrome, particularly black-and-white minimalism, is declining. Photographers are now embracing more vibrant and complex compositions that utilize a broader color palette and intricate details, moving away from the stark simplicity of monochrome minimalism.

4. Ignoring Social and Environmental Issues

Photography that ignores the current social and environmental issues is becoming less relevant. Photographers are expected to be more socially and environmentally conscious, using their art to raise awareness and promote positive change. Ignoring these important issues can make a photographer seem out of touch with contemporary concerns.

5. Traditional Portraits

Traditional, static portraits are being replaced by more dynamic and lifestyle-oriented portrait photography. Clients prefer images that showcase personality and context, capturing people in their natural environments and everyday activities rather than in formal, posed settings.

Embracing the Future

Staying updated with the latest trends is crucial for any photographer looking to remain relevant and competitive. As we move through 2024, embracing new technologies, sustainable practices, and authentic storytelling will be key to creating compelling and impactful images. At SAM Studio, we’re committed to helping you navigate these trends and elevate your photography to new heights.

Happy shooting, and here's to a creative and innovative 2024!

Read More